SQL INSTALLATION
Step-1
For this Please Install the Version 7.0 or SQL Server 2000 or onwards.
Step-2 (Database Creation )
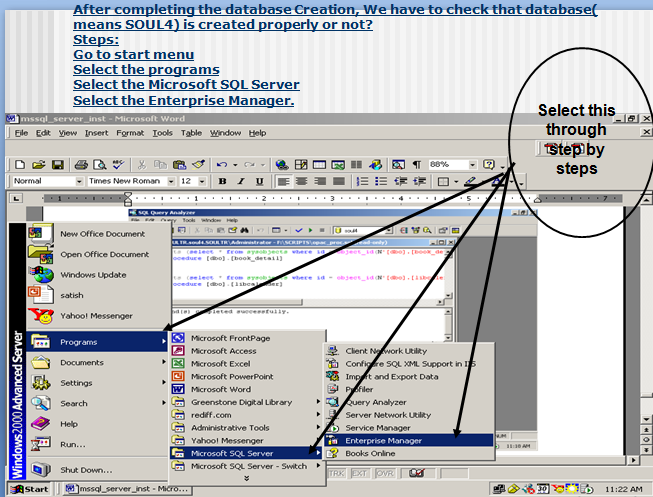
Go to the Start Menu PROGRAMS
=>Microsoft SQL Server
=>Click on Enterprise Manager
=>Click on Microsoft SQL Server plus Icon
.=>SQL Server Group appears.
=>Click on SQL Server Group plus Icon.
=> Local SQL Server Name will appear. Here SOULTR is shown to you.
=>Click on SOULTR(Windows NT) =>all objects will appear like
1. Database
2. Management
3. Replication etc…
=> Select Database options.
=>Right Click on Database
=> You will get the following Options
1. New Databases
2. All Tasks
3. New Windows from here
4. Refresh
5. Help
=> Choose the New database and Click on that…
=>When this following screen will appear=>Enter the name of the database like SOUL or any other name ..=>Click OK Button
=>Check out on the following Screen Your new database is created or not? , =>When you click on your new database SOUL4, the following Screen appears, contained the following objects… ► When you click on Tables of your soul4 database you will find out only 19 items (tables) are there, called system tables…..are auto generated by systems…….► Please Insert the SOULCD inside the CD Drive.►When the Setup Screen will Appear, Please Click on Cancel Button.►One Message Box will appear”Are you sure want to Cancel Button?”►Click on Yes Button.
=> Click on Tools, then the following screen appears….